Become an Expert at Measuring IEMs (using Mac)
By popular request, this is a guide to measuring IEMs’ (in-ear-monitors) frequency response using Mac. For those who might be unfamiliar with the idea of frequency response, it is a measurement of SPL (loudness) relative to the frequency spectrum which generally falls between 20Hz to 20kHz for humans. By visually depicting the relative loudness of different frequencies, we can infer a great deal about the audio quality of a given IEM (such as whether an IEM might sound perceptively dark, bright, or bass-y). In fact, frequency response is widely considered the single, strongest predictor of listener preference! The growing recognition behind frequency response measurements (at least for IEMs) was ignited by Crinacle who currently maintains the largest measurement database, and further popularized by Super*Review’s Squig.link program which allows reviewers to easily maintain their own measurement databases. Many audio reviewers – including myself – use frequency response to ground subjective opinions and to make comparisons between IEMs.

Questions that often get asked are, “But how accurate are these measurements?” and “Can we even trust measurements?”. The answer to these questions will really depend on the ear simulator that is being used, but generally, measurements off the popular IEC-711 clone are reasonably accurate up until ~10kHz or the resonance peak (whichever comes first). After 10kHz, the human ear exhibits a high-degree of variability in HRTF between listeners anyways, thus calling into question the accuracy of the coupler. Additionally, you might observe that couplers – specifically clones – have their own idiosyncrasies: for example, one coupler might measure with more bass, one coupler with more pinna gain, one coupler with more treble, and vice versa. But for the purposes of comparison, especially for measurements taken off the same coupler, it’s safe to say that measurements are quite usable. If you’d like to learn more about how to read measurements and their limitations – such as the resonance peak – then I’d encourage you to read Crinacle’s article or watch Resolve's video on the matter.
But how does one actually perform these measurements? REW, the software we’ll be using to perform these measurements, sweeps a sine wave (a pure tone, with just one frequency) across the entire audible frequency range, and the microphone inside the ear simulator records the level at each frequency. I know this can all seem daunting at first, but I’ll be covering how to get started step-by-step, plus some of the more popular settings in REW. Here’s what I’ll be walking you through:
- Prerequisites
- Setup
- Performing Measurements
- Measuring TWS, CIEMS, and EQ Profiles
- Applying Compensation
- Best Practices
- Saving Measurements
Special thanks to Mad Economist for lending his expertise and answering various questions that I had for this article.
Prerequisites
A common barrier to taking measurements is the idea that getting started measuring is very expensive – and it is. But that’s only if you’re intent on using calibrated, industry-standard measurement systems. If you’re a hobbyist, the cost of entry is significantly lower! Everything that you’ll need to start measuring has been linked below (feel free to source your equipment from elsewhere if you find some of these items for a better price):
- Apple USB-C to 3.5mm Adapter (~$10)
- 3.5mm TRRS to 3.5mm Female and TRS Jack (~$10)
- IEC-711 Clone Coupler (~$90)
- REW Beta 5.20 (free)

The Setup
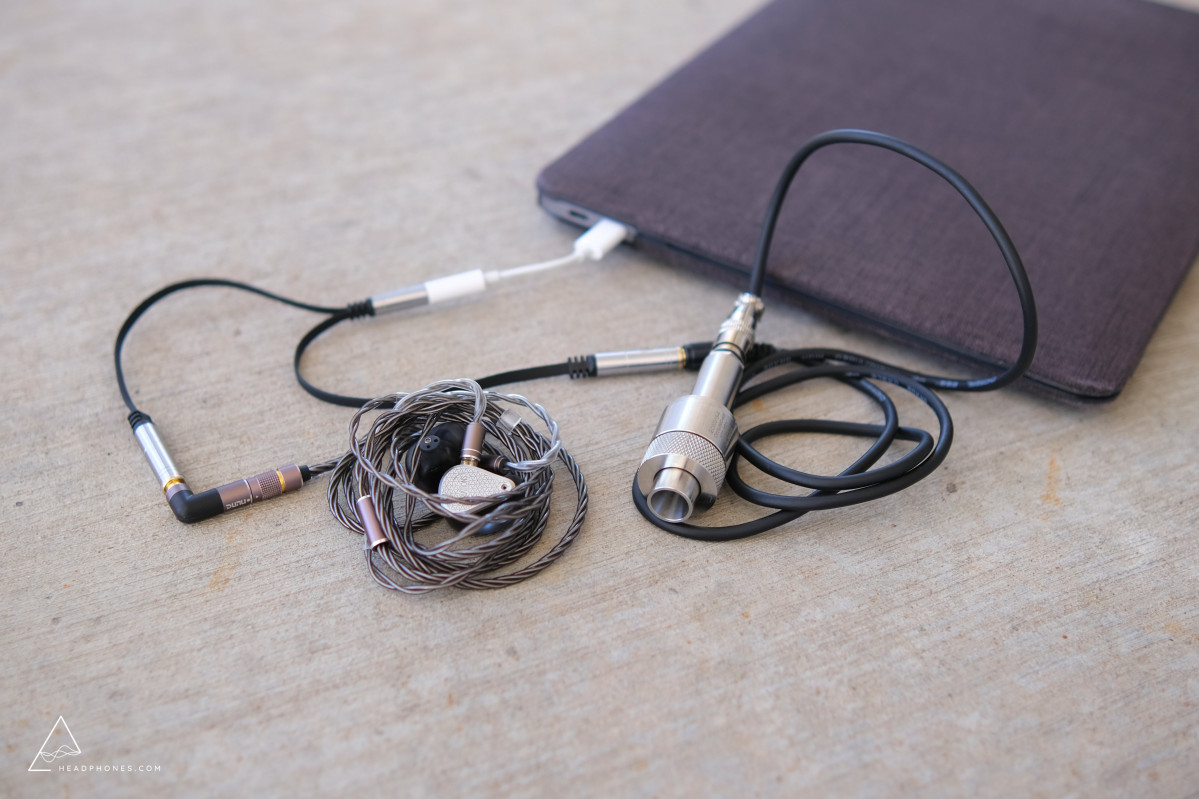
I won’t be discussing how to install the REW software, as it’s pretty self-explanatory if you’ve ever installed an application from the web on Mac. Please make sure you’re using the beta version, though, as that’s what I’ll be writing this guide using. Using the items you should have purchased, the chain that you’ll be hooking up to your MacBook is as follows:
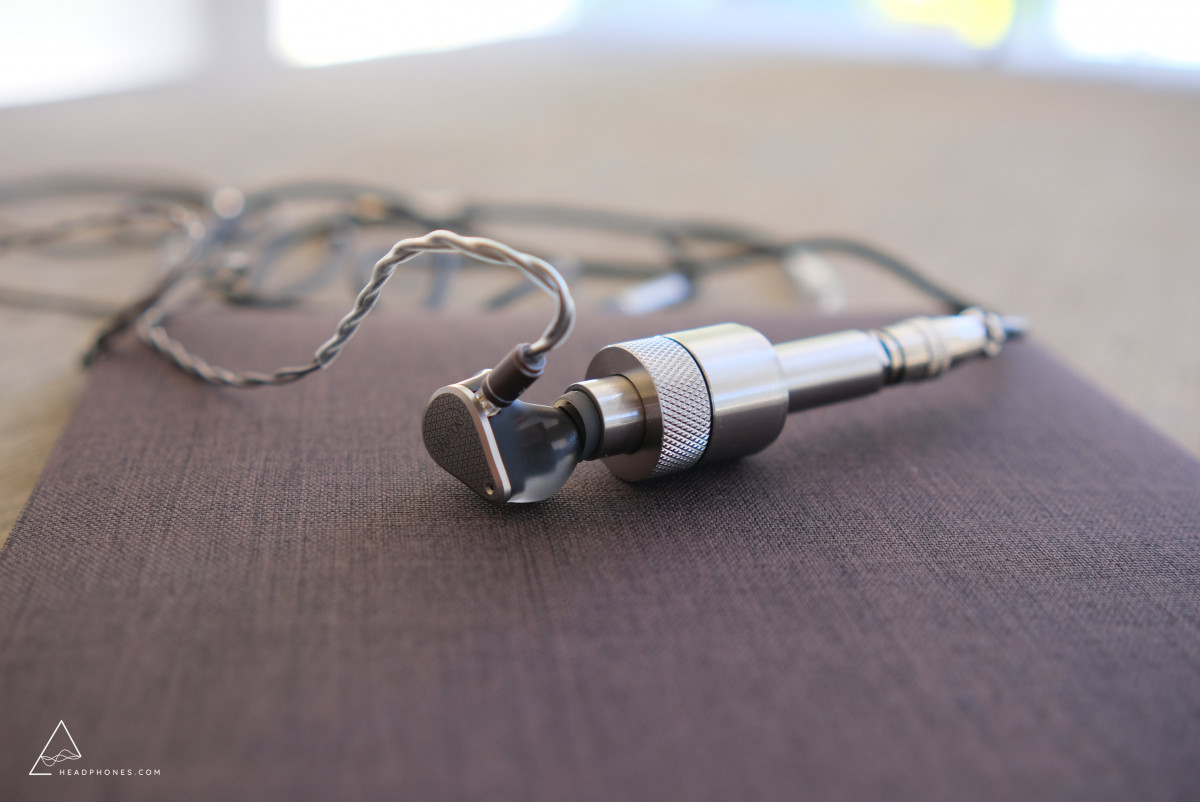
MacBook USB-C Port -> Apple USB-C to 3.5mm Adapter -> 3.5mm TRSS to 3.5mm Female and TRS Jack -> IEC-711 Coupler + IEM
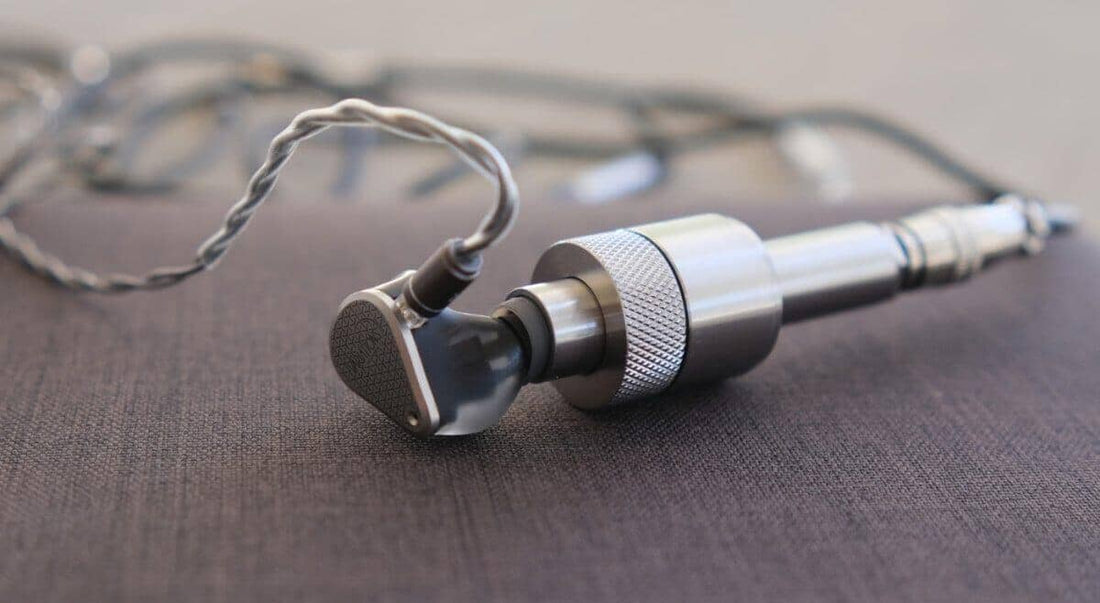
You’ll attach the IEC-711 coupler to the ‘microphone’ output, and the IEM you’re measuring to the ‘headphone’ output of the splitter.
In System Preferences:
Open System Preferences. Click Sound and verify that your Output and Input are set to the USB-C to 3.5mm adapter. If you fail to do this, sometimes you won’t be able to adjust the output volume of the IEM when measuring with REW. You’ll match this setting in REW shortly.

In REW:
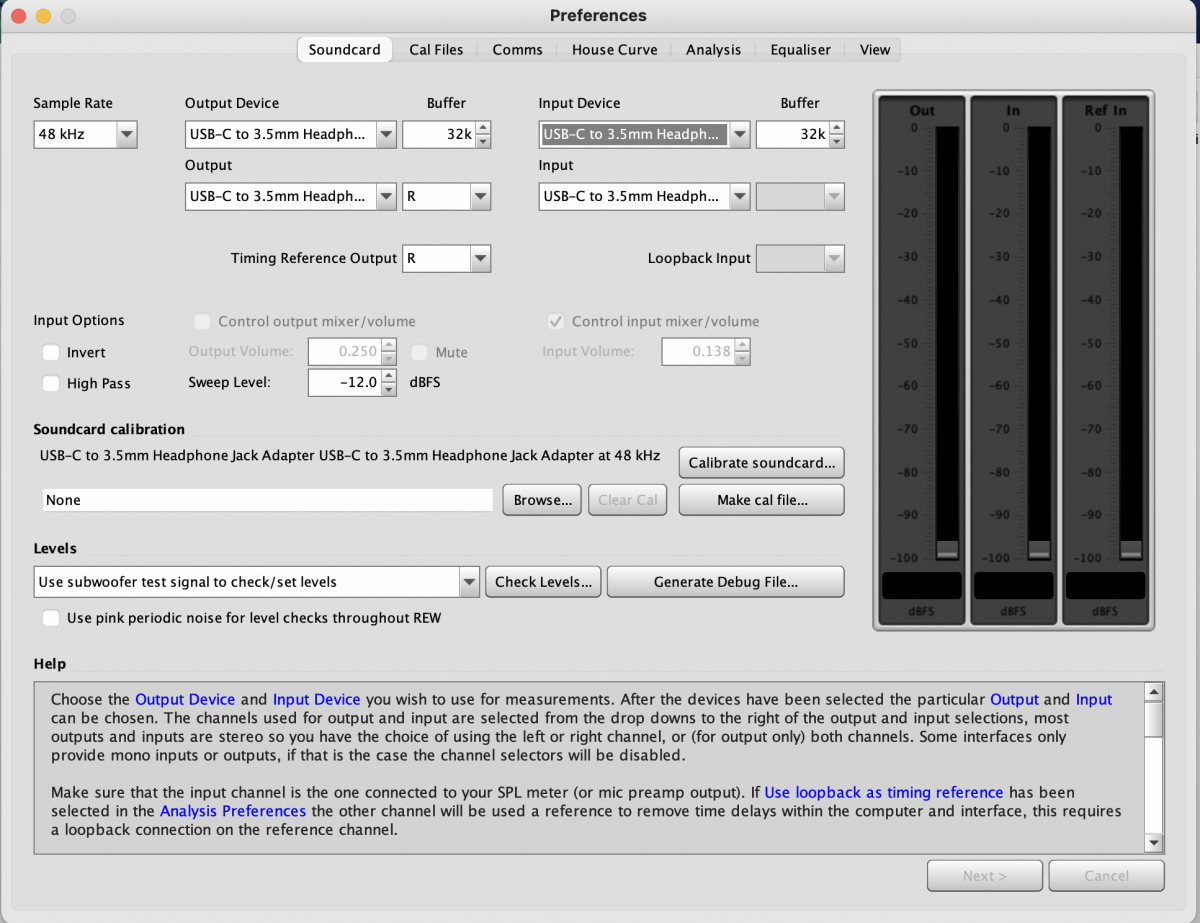
Open REW. Go to the top-left of your home bar and click REW > Preferences > Soundcard. Set the Output Device and Input Device to the USB-C to 3.5mm adapter. Check to make sure your other settings match the screenshot below. Don’t worry about the other settings. However, if you’d like to add a watermark to the background of your graphs, proceed to View and check “Show watermark text on graphs” and enter your desired text below (I believe this may be different if you’re not using the beta version of REW).
Performing Measurements
Okay – you should be ready to start measuring. Insert the nozzle of the right earbud of the IEM you are measuring into the IEC-711 coupler. Then in the top-left corner of REW, click Measure. Here are the settings you should match once you’ve clicked that:
- Set to Method: Sweep and Playback: From REW.
- Verify again that your output is set to the USB-C to 3.5mm adapter.
- Verify that the sine sweep is from ‘0’ Start Freq to ‘20,000’ End Freq.
- The L/R toggle to the side of Output controls which channel of the IEM is being measured (make sure this matches the L/R earbud that is actually inserted into the coupler).
- Length controls the duration of the sine sweep that is being played. 256k is six seconds, which is what I would recommend using, but you can increase that to 512K which is twelve seconds if you’d like.
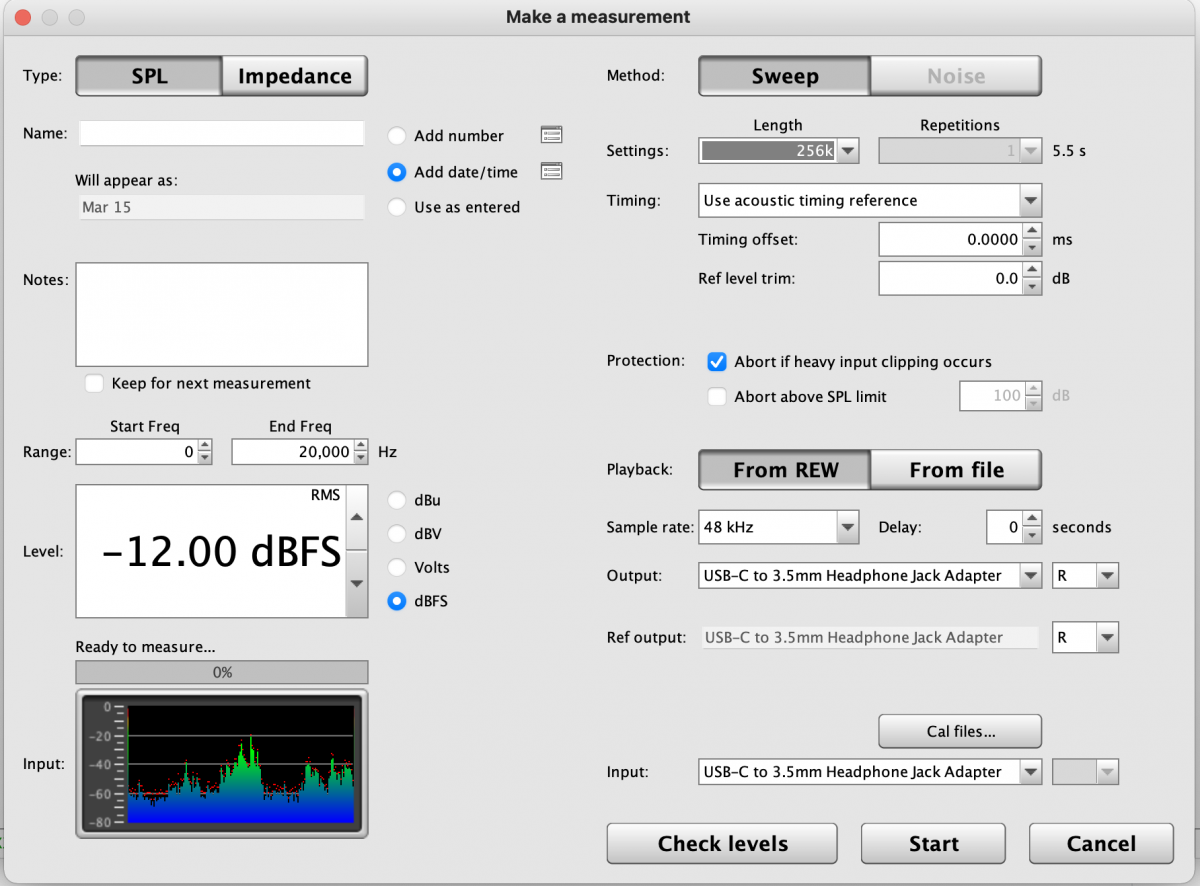
Click Start when you’ve done the above, and the measurement should start taking place. If it misses the timing reference ping (which triggers the measurement), you should click Cancel and then click Start again. The entire measurement process should take no longer than 15 seconds. If you still can’t get it to work, some troubleshooting steps to follow are:
- Raise the volume on your MacBook. Sometimes it’s just not loud enough for the coupler to pick up the measurement.
- If raising the volume doesn’t work, try removing the acoustic timing reference in Timing.
When the measurement is complete, you should automatically be taken back to the REW’s home screen where the IEM’s frequency response will now be on the plot. If it doesn’t show up right away – or it looks garbled – don’t worry just yet. Make sure you have All SPL clicked and then set your Limits to 120 and 60 for the SPL Top and Bottom, 20Hz and 20,000Hz for the Left Hz and Right Hz respectively. Click ‘Apply Settings’. You should now have your frequency response in the fashion with which you’re familiar seeing online.
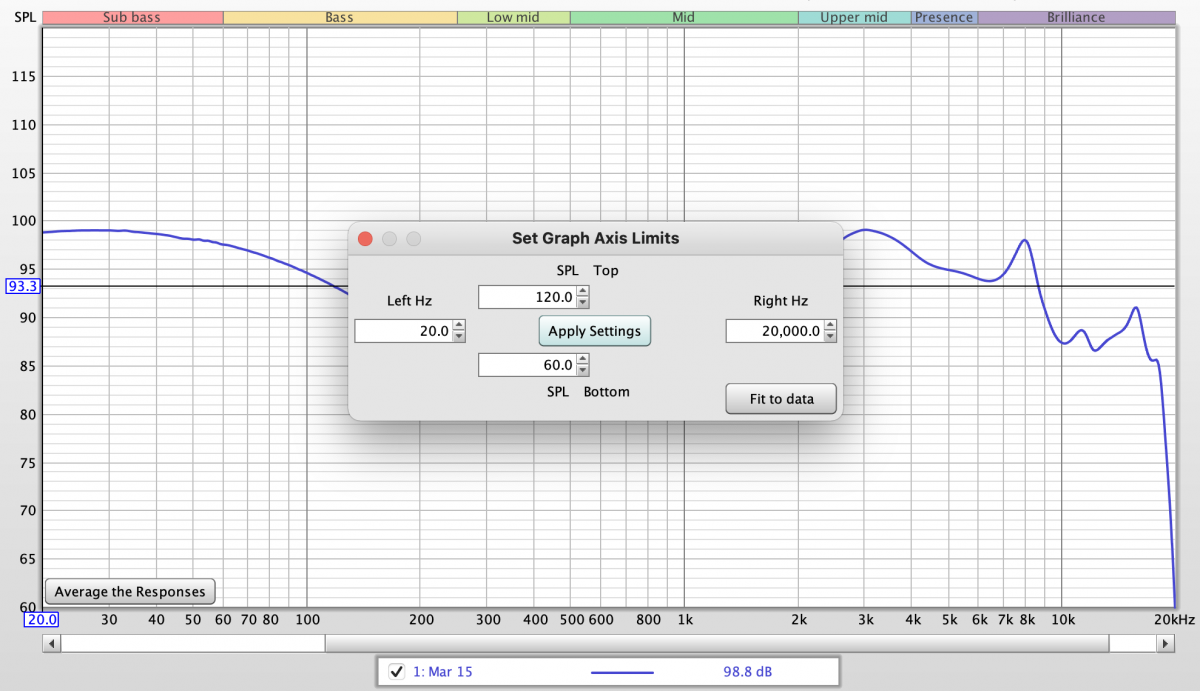

The card panel to the left controls the frequency responses that are showing up on the plot. You have a few options here: click the ‘x’ to remove the measurement, click the paint brush to set the color of the squiggle, and click the default date to re-name the measurement.
At the top right of the plot, Controls > Measurement Actions lets you manually adjust the amplitude of the frequency response. Try and plug in a couple of smaller values like +5 or -5 to get a feel for it. You can also adjust the level of plot smoothing in Controls, which is helpful for getting rid of minor jaggedness in the treble or in the bass. Once you’ve chosen a desired level of smoothing, click ‘Apply smoothing’. Heads-up: too much smoothing is usually undesirable because it can obscure details of the measurement; I usually leave mine at 1/24th or 1/48th if I use it.
Measuring TWS IEMs, CIEMs (Custom IEMs), and EQ Profiles
Measuring traditional IEMs is actually pretty easy, but you’re going to have to get more creative if you want to measure TWS IEMs or CIEMs.
The best approach for TWS IEMs is to simply pair them to your MacBook, change the Outputs to the TWS accordingly in REW and Settings > Sound, and proceed with the steps in the Performing Measurements section. Be aware that some TWS IEMs use heat sensors, meaning that you’ll need to grasp them to get them to start the measurement. You might also want to use the method for measuring the effects of EQ below if your TWS IEM has a companion app that allows for sound adjustments.
Measuring CIEMs is more difficult due to their unique nozzles; you can’t use ear tips to form a seal with the coupler. If you’re lucky, you might have access to a rubber attachment like this one, which is what 64 Audio uses to measure their CIEMs. But most likely, you’ll want to pick up some blu-tack or equivalent mounting putty. You’ll use this to form a seal around the coupler and the nozzle of the IEM, and then follow the steps in the Performing Measurements section above. Be aware that it can take quite a lot of work to form a seal! You’ll usually know it’s not working correctly when the bass response rolls-off dramatically. The accuracy of these measurements is also questionable as it’s very difficult to achieve an identical seal between the L/R ear buds to even check channel matching.
Measuring the effects of EQ is difficult on Mac which doesn’t have system-wide PEQ like Windows. There’s probably an easier way to do it, but my workaround so far has been using my iBasso DX300 + PowerAmp (which has PEQ). Your setup this time will consist of plugging the IEMs you’re measuring into the device from which you’re applying EQ, and then, per usual, inserting the nozzle of the IEM into the coupler. Don’t worry about changing any of the Output settings in REW or on your Mac for this.


But first, you’ll want to generate a sine sweep file. In REW’s home bar, click Generator > Sweeps. Set the starting and ending frequencies to 0Hz and 20,000Hz respectively, and the length to 256K. Save the file as a .WAV file by clicking the bottom right. Or you can simply download the file from here. Save this file to both the device that you’re going to be using to apply EQ and to your Mac.

This is where you’ll be making use of the ‘From file’ option in Measure. Drag the sine sweep file into the Sweep file box, or click Browse and select the sine sweep file from there. Click Start and then, on your device with EQ, open up the sine sweep file and hit play. The measurement should start taking place, yielding the IEM’s default frequency response. Now apply the EQ on your device and repeat the same steps above from Click Start. This is the IEM’s frequency response with EQ applied. If you’re having trouble getting this to work – for example, the coupler isn’t picking up the acoustic timing ping – you can try turning off the acoustic timing reference. You’ll just have to time the sweep and when you press Start more carefully.
Applying Compensation
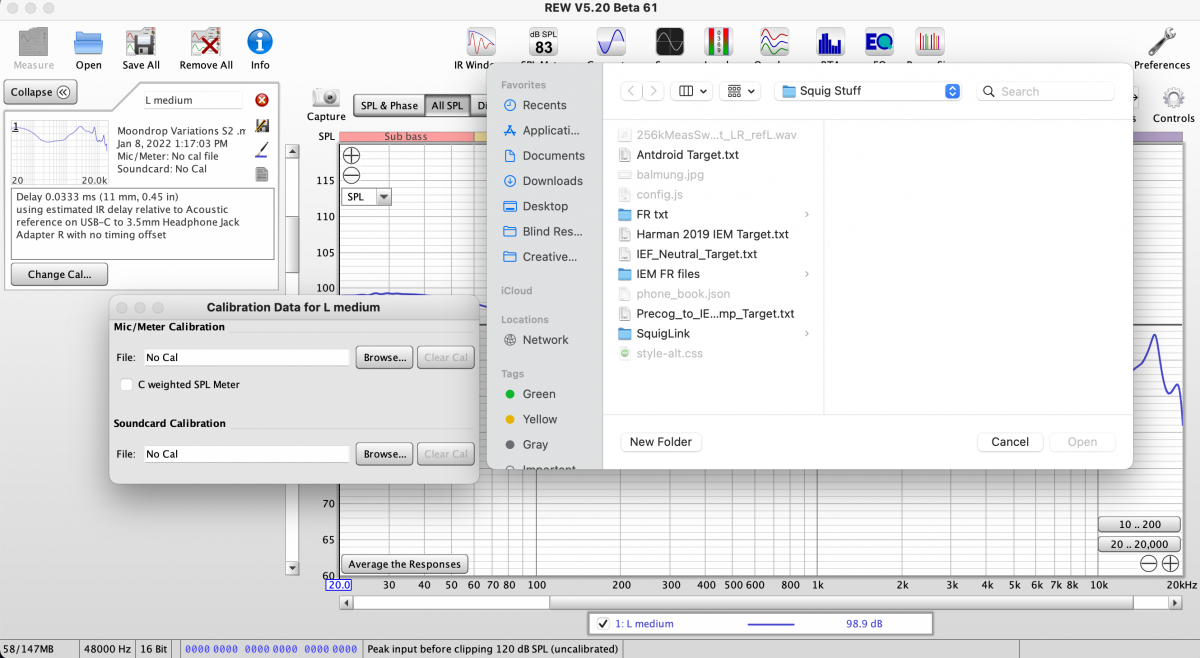
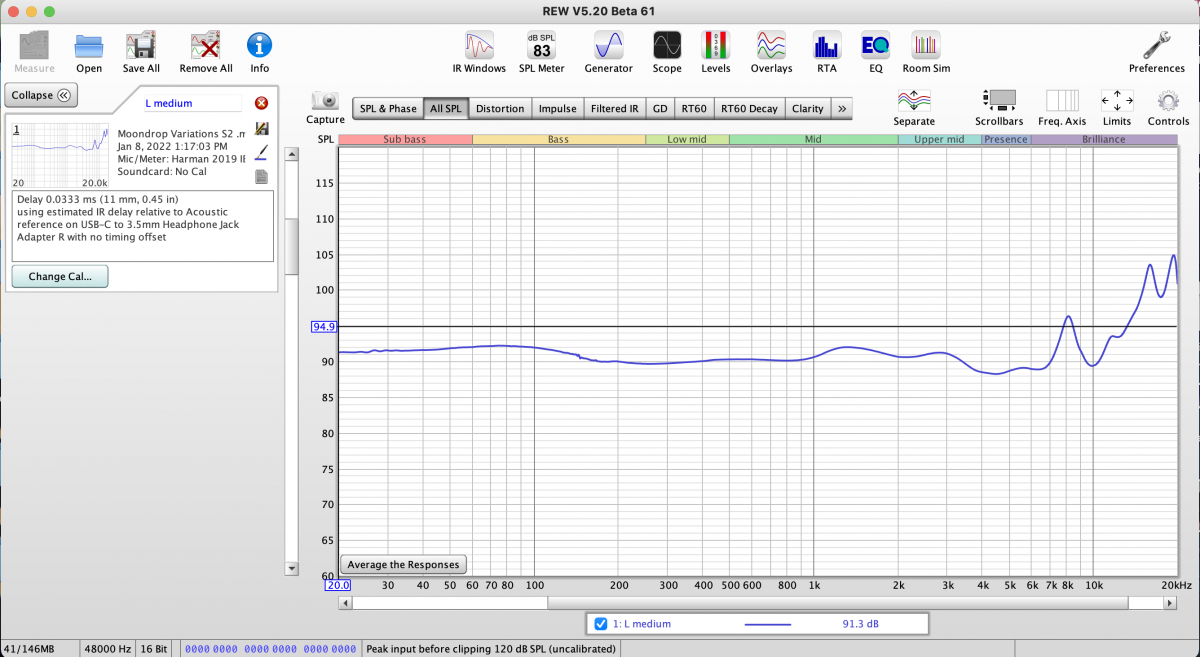
Sometimes you might want to see how an IEM’s frequency response compares to a given target. In this case, you can use REW’s calibration feature. Under the frequency response cards to the left of REW’s Home Screen, click Change Calibration. Then click Browse for the Mic/Meter Calibration and choose the .txt file you want to compensate the measurement to. After selecting the .txt file, you might no longer see anything in the plot. Use Controls > Measurement Actions > SPL Offset and adjust the number until you can see it. To remove the compensation, go back to the card and Change Calibration > Clear Calibration.
In the example below, I’ve applied the Harman 2019 IEM target to the Moondrop Variations. You can download the Harman 2019 IEM target here, as well as the IEF Neutral target here. These are the targets that I personally use most often when checking for target accordance.
Best Practices
The insertion of the IEM’s nozzle matters. Without a proper seal, parts of the measurement are likely to appear rolled-off. The depth of the nozzle’s insertion will also affect the frequency of the resonance peak. As a general rule, a deeper insertion pushes the resonance peak higher in frequency. Aiming to line-up the resonance peak at the same frequency between measurements is ideal. Of course, this is not always possible if you’re measuring an IEM with a particularly deep insertion like Etymotic’s IEMs; vice versa applies too.
Ear tips matter. Try it for yourself and you’ll see. Due to minor aberrations that might also be present between even the same model of an ear tip, I would recommend using the same exact ear tip when taking L/R channel measurements.
Impedance from your source, and the sensitivity of the IEM being measured, can affect the resulting frequency response. This is mostly a concern with high output impedance sources (for reference, the Apple USB-C adapter’s is quite low) and particularly sensitive IEMs such as Campfire Audio’s.
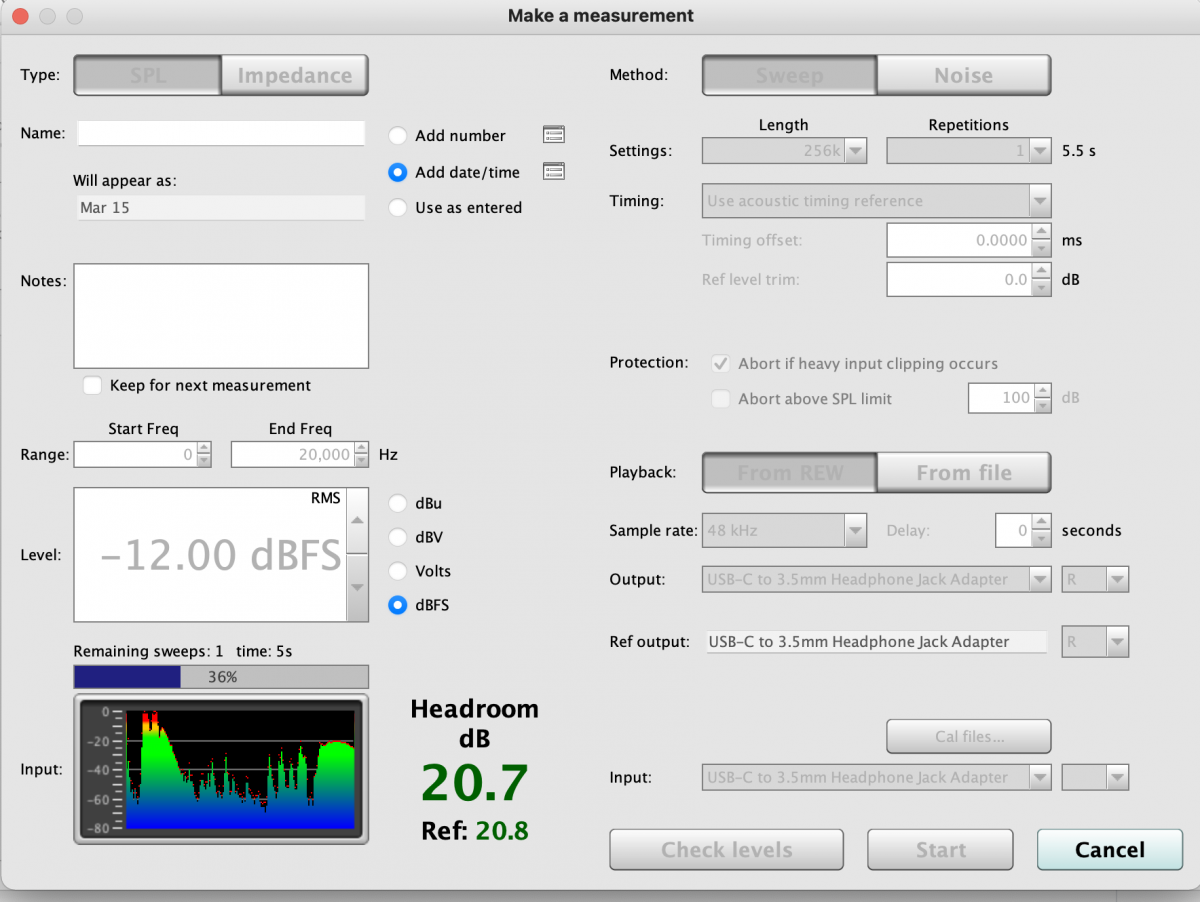
Be aware that the measurement coupler is highly sensitive to noise and that background noise can be reflected as distortion of the frequency response. For the best results, measure in a quiet environment. Higher volume and raising the number of repetitions in the Repetitions setting will yield less jaggedness to the frequency response and reduce the influence of ambient noise. Watch the Headroom meter (aim for no lower than 10dB) and use the volume control of your MacBook to adjust the IEM’s volume accordingly before and after taking the measurement.
Saving Measurements
There are a couple of formats that you can save measurements to using REW, but the two most popular are as a .txt file and as a native REW .mdat file. With the .mdat file, you’ll be able to open up your exact previous measurement just by clicking the file. The .txt file is more popular for uploading measurements to graph tools; however, you can also import them directly into REW using File > Import > Import frequency response and clicking the .txt file.
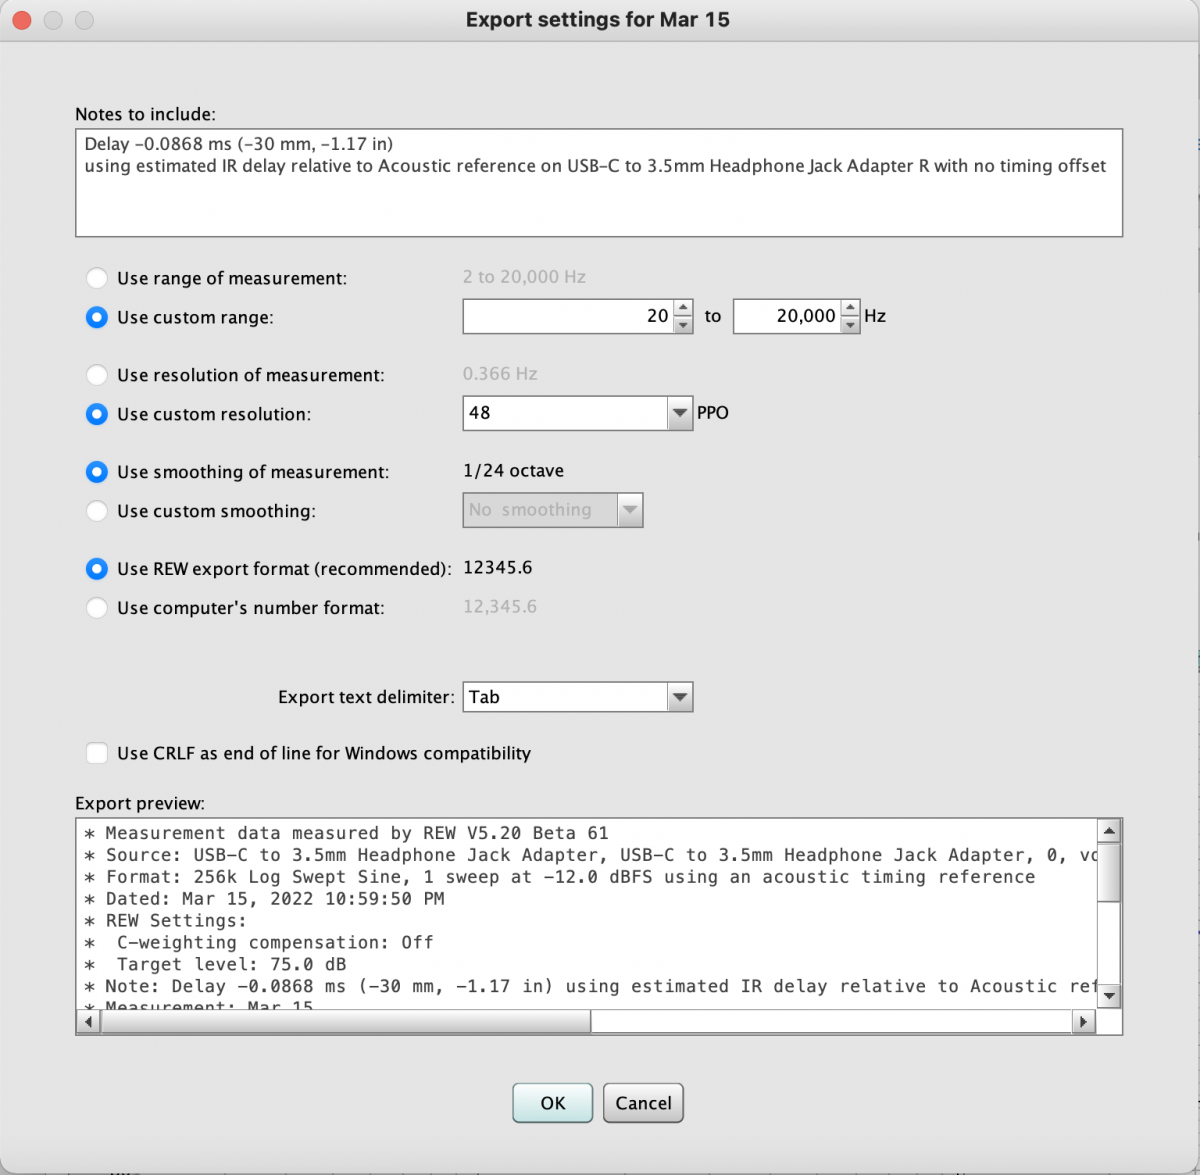
To save measurements as a .txt file, go to File > Export > Export Measurement as Text (for single measurements) or Export Measurements as Text (for multiple measurements). If you’re exporting a singular measurement like this, it defaults to the measurement that you currently have clicked on the left cards panel in the home screen of REW. Click ‘OK’ and then choose the directory on your PC you’d like to save the file to.
To save measurements as a .mdat file, go to File > Save Measurement (for single measurements) or Save Measurements (for multiple measurements). If you’re exporting a singular measurement like this, it defaults to the measurement that you currently have clicked on the left cards panel in the home screen of REW. Choose the directory that you’d like to save the file to.
Additionally, to save measurements as a screenshot, it’s as simple as clicking the Capture button with the camera in the left corner of the plot. The settings for that are fairly self-explanatory; however, note that the constraints of the plot in the image will depend on the size of the window you’ve set for REW (basically, it literally corresponds to the size of your window in REW when taking the screenshot).
Further Reading
This is just the most popular way to perform IEM measurements and you don't need to have access to a Mac to take them. If you’d like to learn how to measure IEMs using just your iPhone, then please see this article by Headphonesty. I'm also considering updating this article in the future with instructions for Windows users. In any case, thanks for reading, and I hope this guide was helpful!